Basics
Aturian, Portal, and PopUp Notes Explained
Item Types
▶️How to Manage Order Notes
Items, Variants, & SKUs Explained
Accounting Statuses Defined
Orders
📁Creating An Order
📁Orders List
📁Tracking & Follow-Up
Processing & Scheduling
▶️How To Manage In-House Decoration
▶️How To Complete Orders
▶️How to Manage Open Orders
▶️How To Upload Order Documents
▶️How To Manage Draft Orders
Customers
Suppliers
Inventory
▶️How To Complete A Miscellaneous Inventory Adjustment
▶️How To Create Invoices From Pick Tickets
▶️How To Manually Adjust Inventory
▶️How To Use Pick Tickets with Pick/Pack
▶️How To Create A Reference Item
▶️How To Set Up & Process Royalties
▶️How To Process A Return To Inventory
▶️How To Process Inventory Receipts & Post To The Receiving Journal
Invoicing
📁Creating PreBills
📁Creating Credit Memos
📁Managing Prebills
▶️How To Reverse Customer Invoices
▶️How to Create Invoices From a List
▶️How to Process Single Customer Invoices
▶️How To Pay With Credit Card in Aturian
Stale Invoices
▶️How To Audit Sales Journal & Transmit Invoices
▶️How To Adjust Customer Invoices
▶️How To Manually Adjust/Add Sales Tax
▶️How to Create Consolidated Invoices
A/R
📁Customer Payments-Receipts
📁Applying Payments
▶️How To Apply Credit Memos to Open Customer Invoices
▶️How To Apply An Existing Deposit Using Print Checks
▶️Credit Card & eCheck Payments
▶️How To Reallocate A Customer Payment
▶️How To Apply A Customer Deposit To An Invoice
▶️How To Automate A/R Collections
▶️How To Process A Customer Refund Check
▶️How To Move A Customer Deposit
▶️How To Process A Refund Check From Supplier
A/P
📁Supplier Deposits
📁Checks and Payments
▶️How to Apply An Existing Deposit Using Print Checks
▶️Paying Supplier Invoices by Credit Card
▶️Paying Suppliers/Vendors with Single Checks
▶️How To Void A Vendor Payment
▶️How To Process Vendor Payments Via ACH
📁Enter Supplier Invoices
▶️How To Create a Non-PO Vendor Invoice
How To Process A Single A/P Invoice for Multiple PO's
▶️How To Enter Supplier Invoices and Close The Purchasing Journal
📁Manage Supplier Invoices
📁Shipping File Upload
▶️How to Manage Supplier Credits
Accounting
📁Year End Processing
📁Sales & Commissions
Managing Commissions Payments
Splitting Commissions Amongst Multiple Salespeople
Commissions Profiles Explained
▶️How to Process Sales & Commissions for Payroll
📁Bank Reconciliation
▶️How to Reconcile AP Ledger and GL
▶️How To Close A Book Period
▶️How To Create Manual Journal Entries
Reports
▶️How To Navigate Miscellaneous Reports
▶️How To Navigate Invoicing Reports
▶️How To Navigate Inventory Reports
Administration
Import/Export
▶️How To Create Tax Routines
Email SMTP Setup by Department or by User
▶️How To Add A Warehouse
▶️ How to Create/Modify Templates and Branding
📁Avalara & Tax Mgmt
- All Categories
- Basics
- Aturian, Portal, and PopUp Notes Explained
Aturian, Portal, and PopUp Notes Explained

Notes can be added to orders and their corresponding invoices in a few different ways.
The notes icon in your orders list will light up in red regardless of which of the three note types you add.
Aturian Notes
These notes live with the order with the option to notify a particular user(s) or an entire department.
Checking the notify by email box will have Aturian send an email to the user in addition to 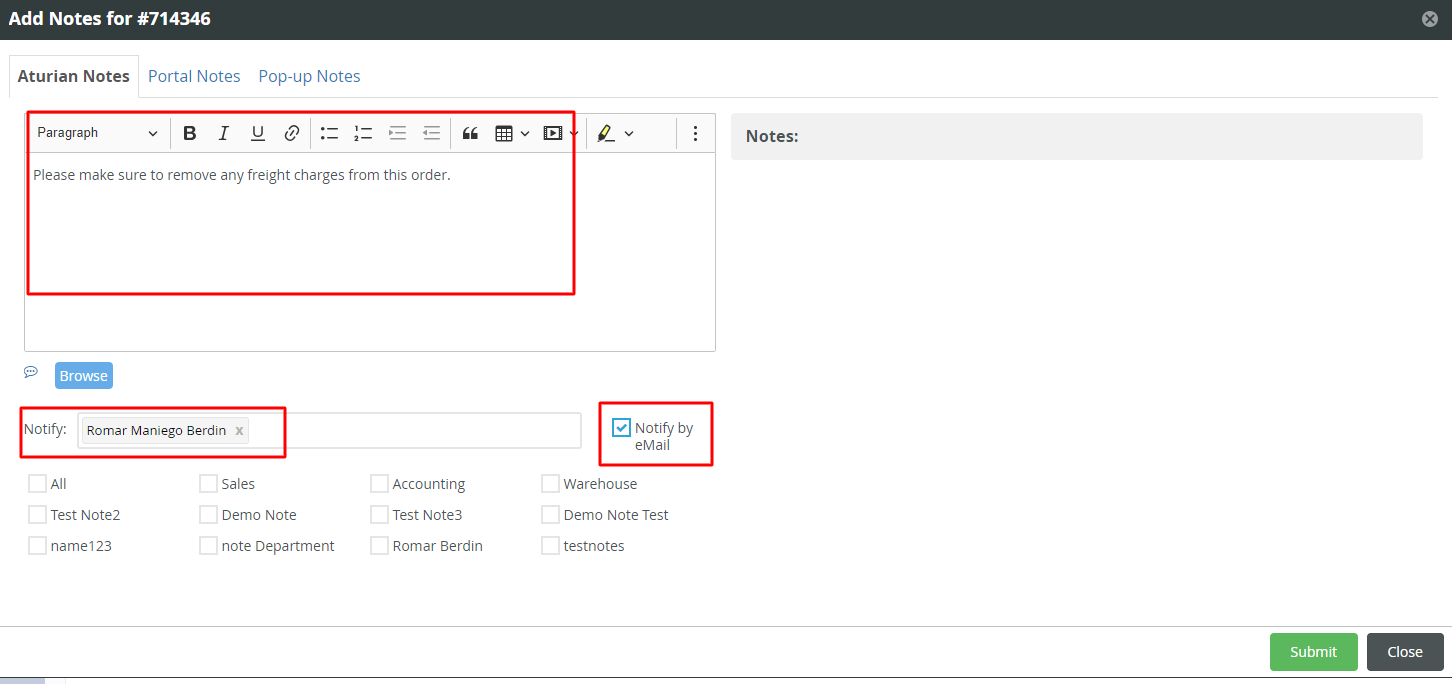 |
Portal Notes
These notes get shared with customers if you have created a Customer Portal for their users.
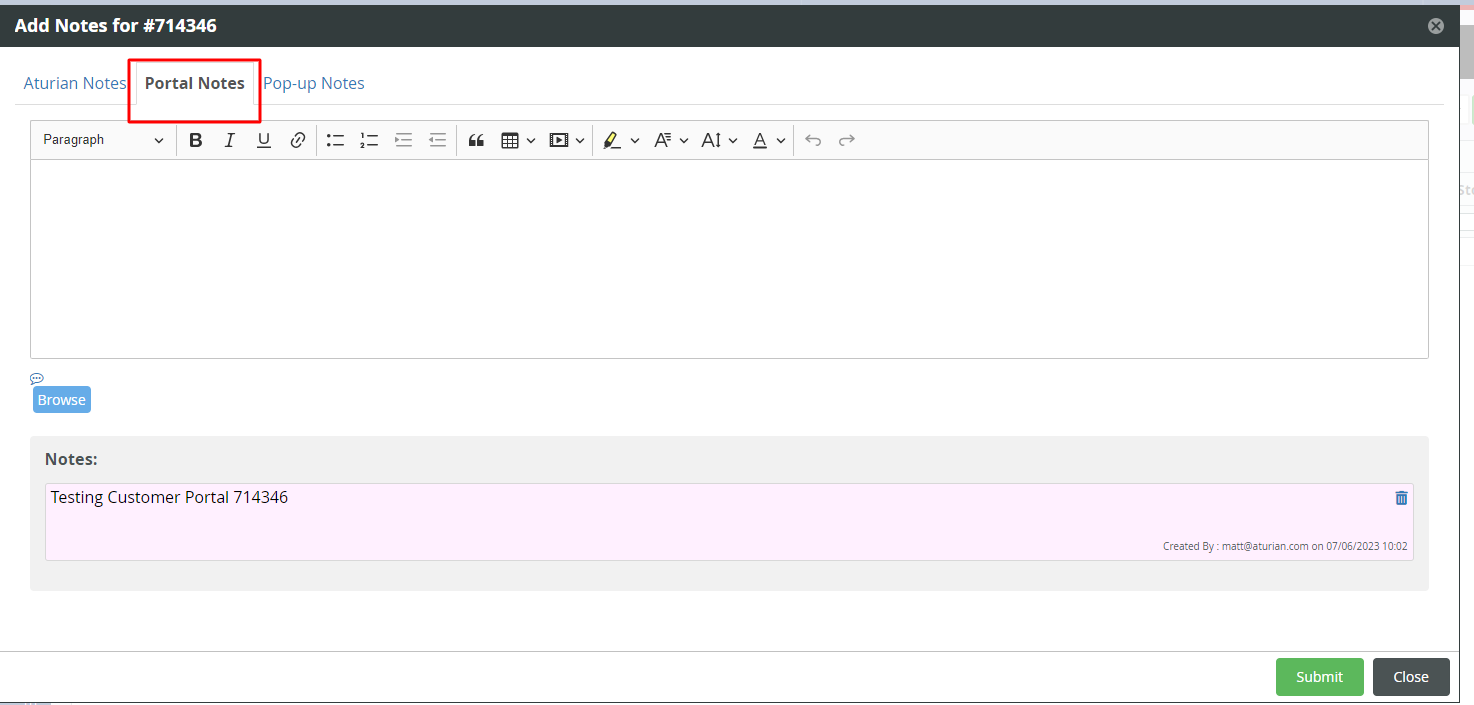 |
Any customer with login access to their Customer Portal can click the Notes icon within their order and see messages or files you have added to the Portal Notes section. 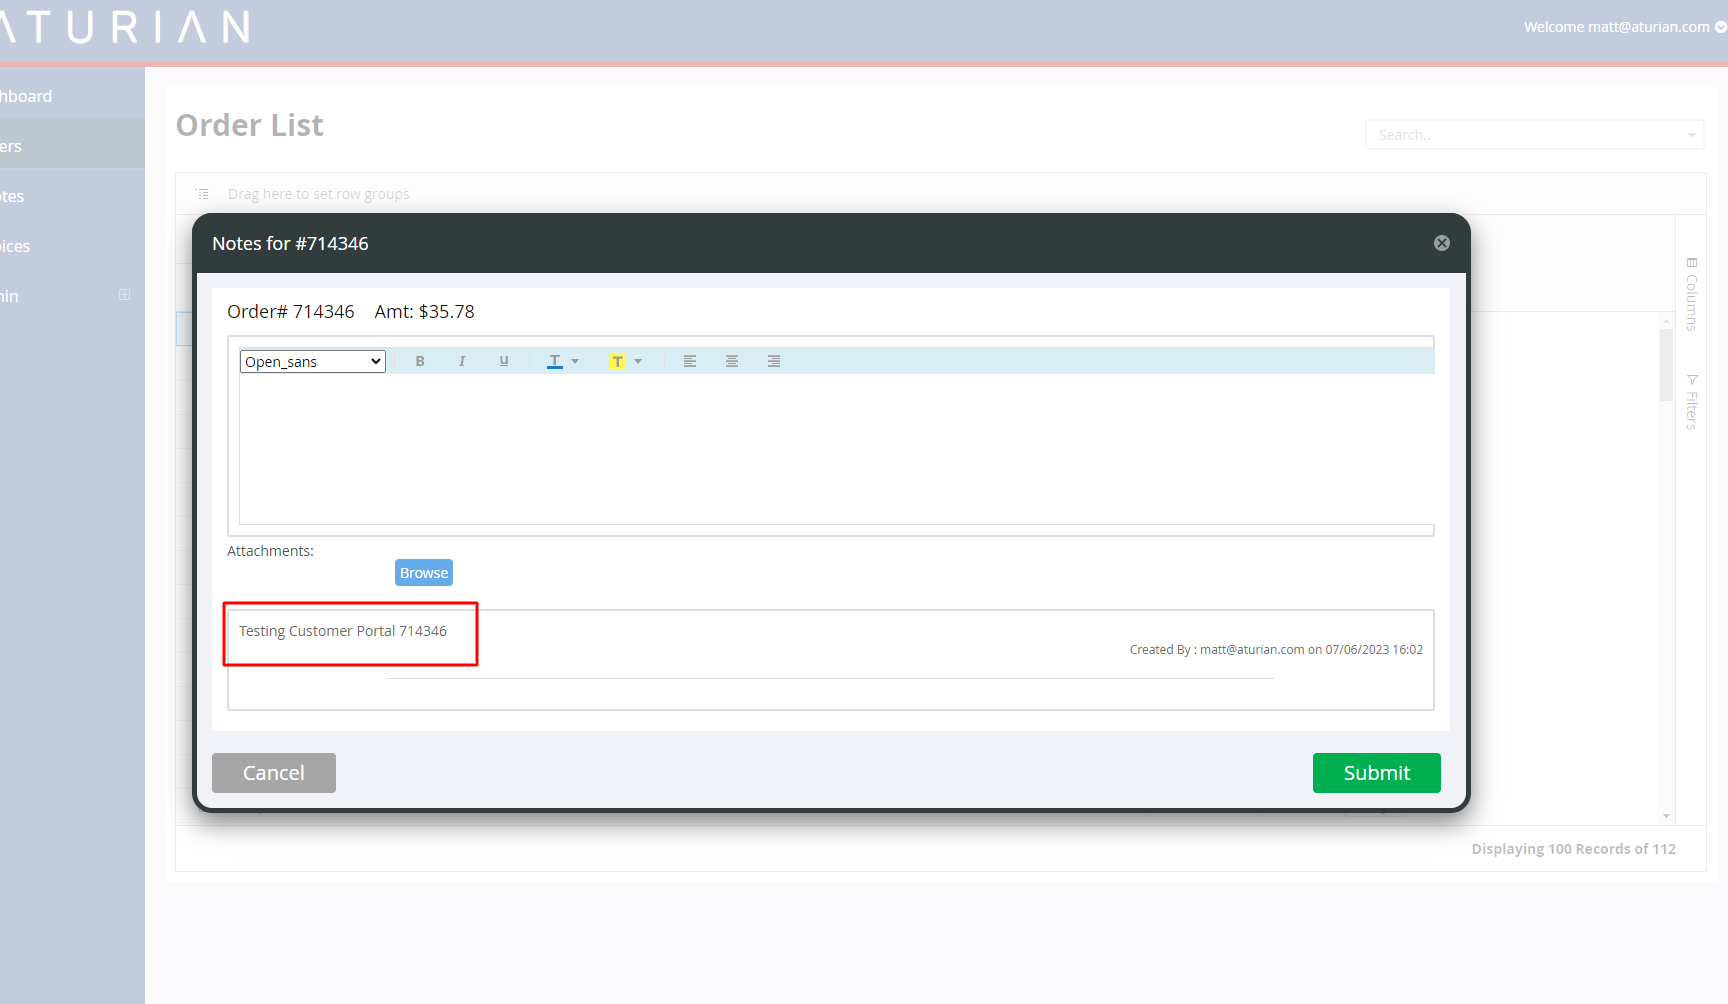 |
PopUp Notes
PopUp Notes will automatically appear when accessing the order based on how you would like to notify other users.
*Selecting a user to notify will mean only that user will see the note when accessing the order.
You can choose to leave the PopUp note at the order level so that ANY user accessing the order will see the PopUp Note.
 |
Notifications from Notes
Every user will have a notification bell icon added when they receive a note.
When clicking the bell icon, the list of current open notes will appear. Clicking on an active note will drop it to the bottom of the list once read. 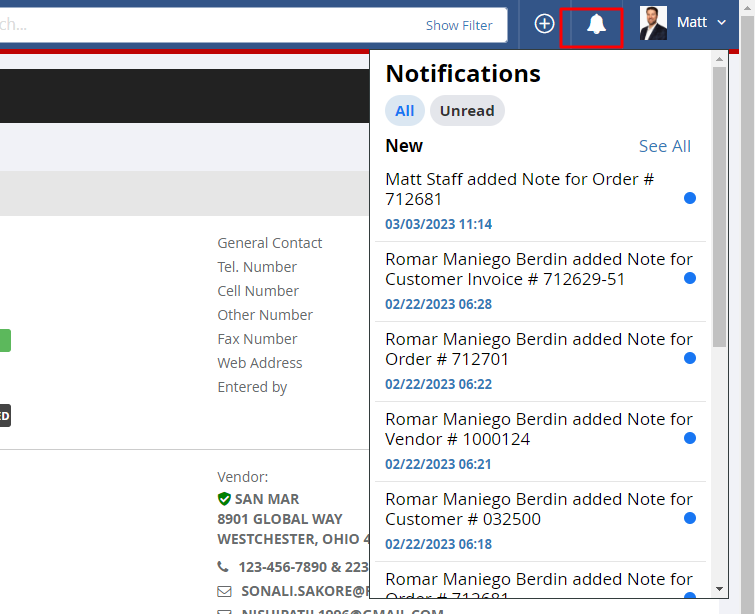 |
Users can still access their list of notes by clicking See All in the drop down list. This is where notes can be deleted, rather than shuffling them to the bottom of the list once read. 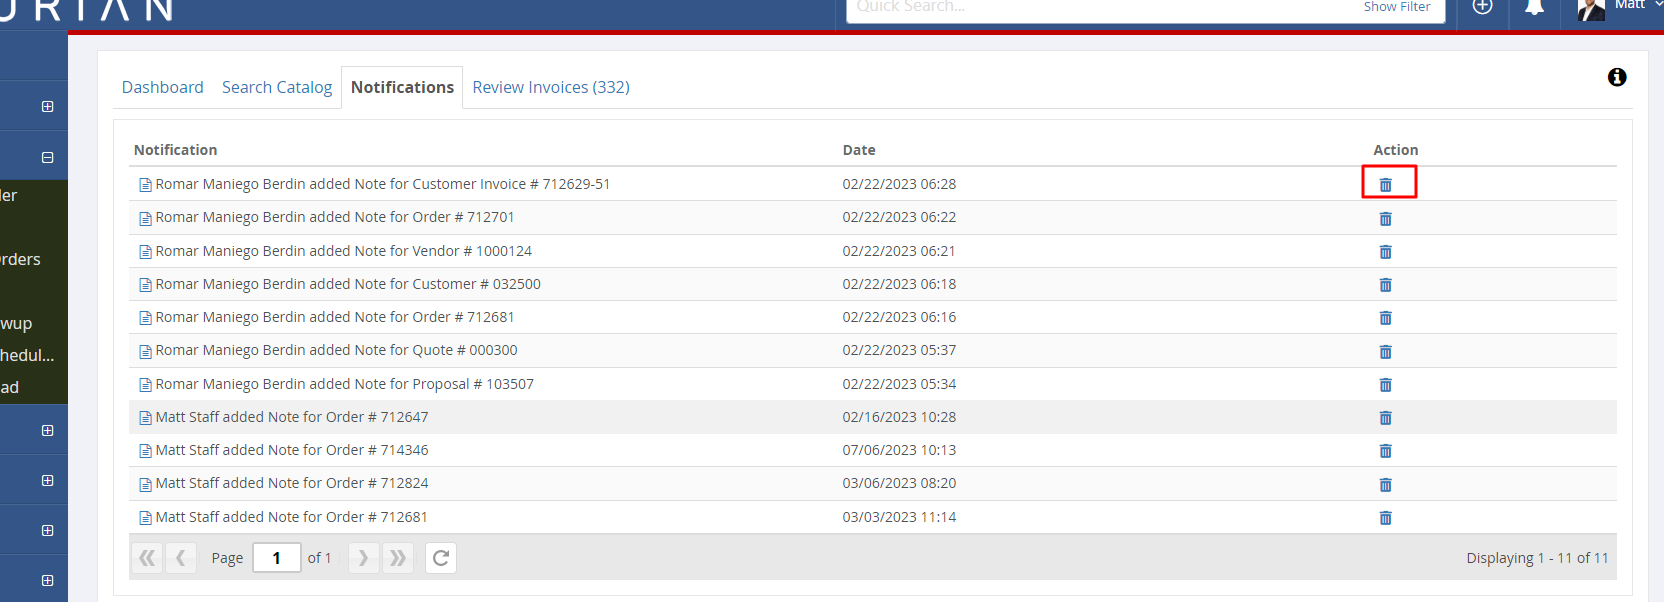 |